
Now, this is probably useful in a lot of circumstances, but for me it's never, ever useful. First of all, I would format that date 07/01/2014, not 2014-01-07, and second of all, I just don't insert dates in either format into the vast majority of my documents.
What I do, though, is start my documents with Client Name Jan 2014 (or whatever the relevant month and year might be), and when I hit enter to insert a line break, I get the month and day tagged on to the end of that header whether I like it or not.
"It's in Settings, under Autocorrect/Autocomplete..." No, it's not, I've looked. Believe me, I've looked through every setting for anything relating to autocomplete, autocorrect or autoformatting dates, there's no toggle option for this in Word 2007.
So what's the solution? Herb Tyson has the answer here, but as it requires you to write a Macro, I've recreated the process below with screenshots for those of you who are not familiar with programming in Visual Basic (don't be scared, it's easier than it sounds).
1. Create a Macro
In Word 2007, click on the Developer tab on the Ribbon, and then click the Macros button.

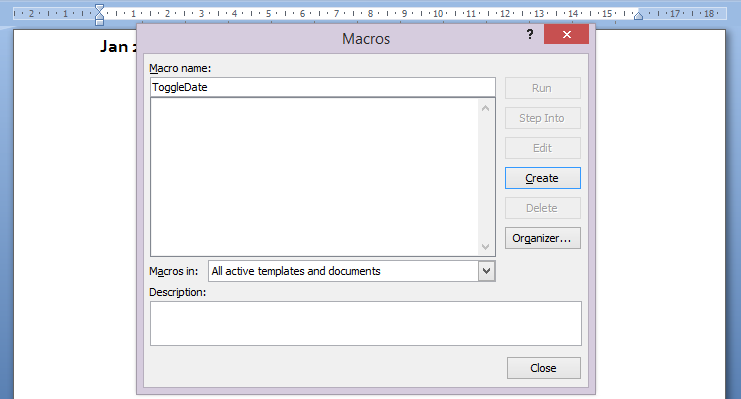
Fill in a name for your Macro - all one word, please! - I favour ToggleDate for this one, but go with something you'll recognise later. Click Create.
2. Insert Macro Code
The Visual Basic window that opens should look something like this:
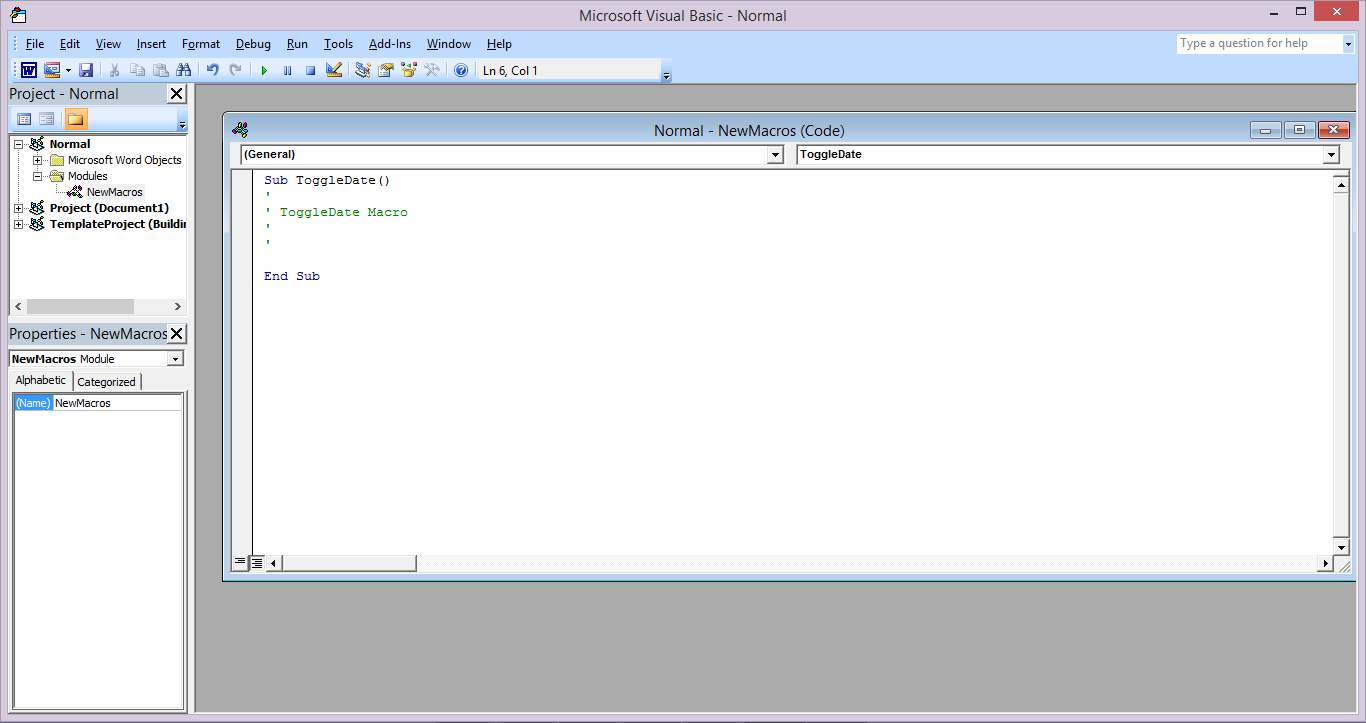
Notice your chosen name for your new macro is already inserted into the code after the word 'Sub'. If you have other macros already set up, there may be additional code visible - only edit the part that begins with 'Sub ToggleDate ()' (or your chosen name for your macro) and ends with the corresponding 'End Sub' tag.
To create a macro to turn off date autocomplete (or, more precisely, to toggle it on and off, so you can switch it back on in the future) you need to alter the code to read as follows:
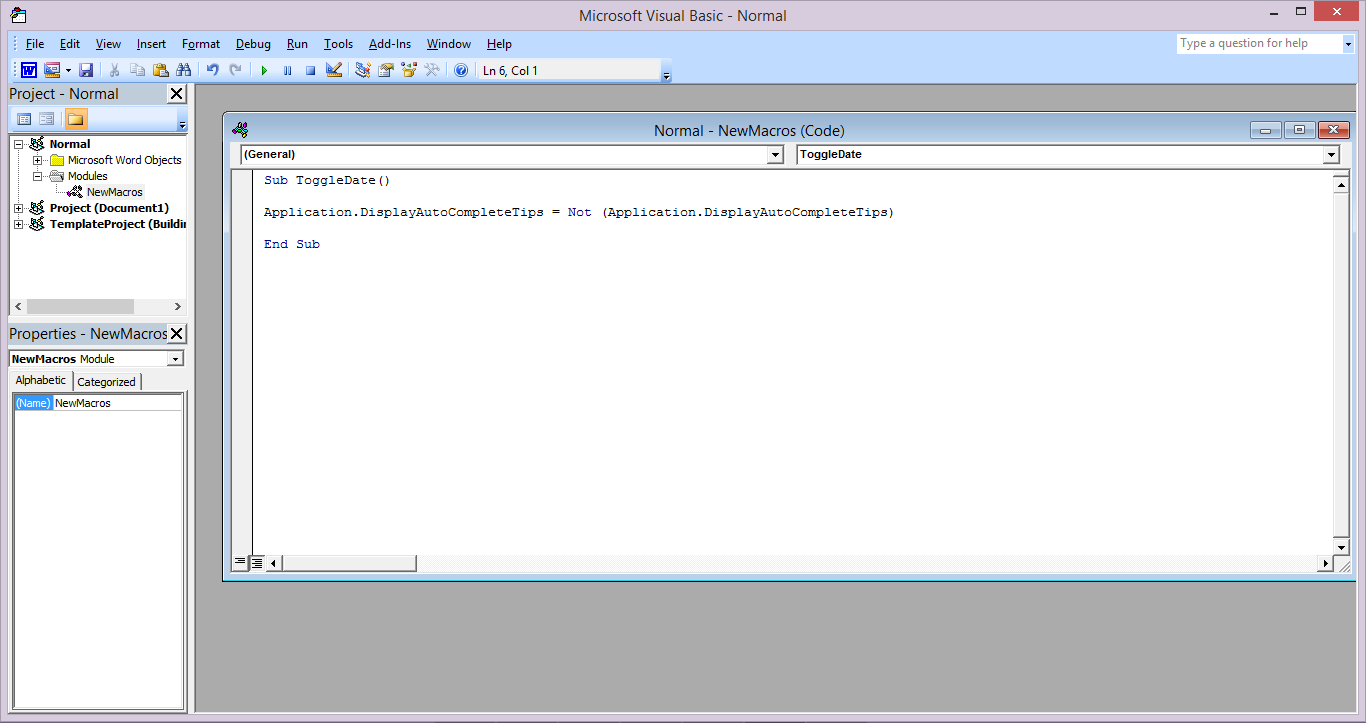
You can copy and paste the code from here:
Close the Visual Basic window by clicking on the red X until you're back to your Word document.
3. Run the Macro
To run the macro, click the Macros button again, make sure ToggleDate is selected in the list, and click Run.
Once you've done that and the macro has completed (look for the progress bar at the bottom of the screen, just to the right of middle), your dates should no longer autocomplete when you hit enter - allowing you to end a line with the year, without a full stop, and without having to go back and delete the day and month.
To turn date autocomplete back on, run the macro again - the same section of code toggles between on and off and back on again, as opposed to requiring a separate 'on' macro.
4. Shortcut it
If this is something you are likely to need to toggle often, you can create a shortcut to it in one of two main ways.
Firstly, if you want a clickable button, click the down arrow next to the Quick Access Toolbar and click on More Commands.
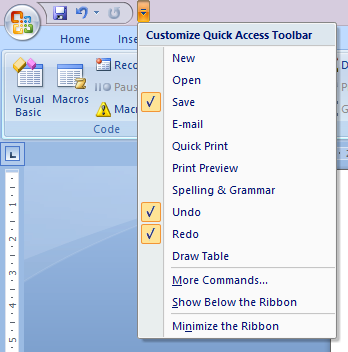
Select Macros from the dropdown list.
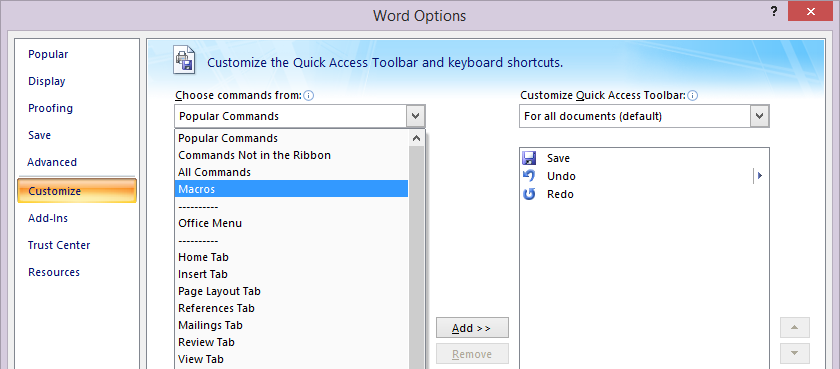
Select your macro and click Add to add it to your Quick Access Toolbar, the row of buttons alongside the Office button (or below the Ribbon, if you've selected Show Below the Ribbon).
You can now click Modify if you want to rename the macro's button or change its display icon.
Secondly, if you prefer to use a keyboard shortcut, simply click Customize next to Keyboard shortcuts, again on the More Commands pane.
Scroll down to Macros, choose your ToggleDate macro, and assign your preferred keyboard shortcut to it.
You should now be able to toggle date autocomplete on and off either by clicking the icon on the Quick Access Toolbar, or by hitting the keyboard shortcut you have assigned to it.
If you do not assign either shortcut, you can also do it the long way around, by opening Macros on the Developer tab, and running the ToggleDate macro.
I wish there was an easier way - a toggle option somewhere in the settings - but this is the only solution I've found, and it's unlikely to be an option for anyone with a particularly locked-down work computer.
Hopefully it's helpful to somebody though, it's definitely going to make my life easier from now on.


